Posts

Showing posts from May, 2011

Tim Holtz Style - Happy Birthday Masculine

Image
I wanted to make a card for a dear family member who is a builder. The 'materials' used here are in the 'Tim Holtz' line. This card was a lot of fun to make. Happy 'Memorial Day' to all..... Directions...see below or ask me please! Thanks for taking time to look at my card! http://www.splitcoaststampers.com/gallery/photo/1983864?&limit=last1 I found this wonderful website that you just have to see! Please take the time....h ttp://studiol3.blogspot.com/ Tim Holtz Products http://www.timholtz.com./products.html And of course....Tim Himself!h ttp://www.timholtz.typepad.com/
PDCC83 Black & White Splash Of Green

Image
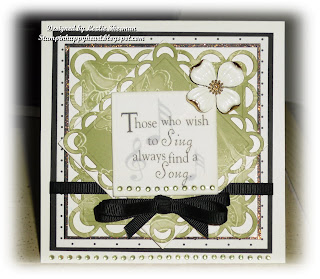
Recipe: All Supplies are Stampin Up! unless otherwise noted. DSP: Paisley Petals, Day And Night Card Stock: Basic Black, Whisper White Ribbon: Basic Black 1/4" Grosgrain Dies: 'Classic Squares Small' and 'Lacy Squares' (Spellbinders Nestabilities) Rhinestones: Kaiser Craft (green) Misc: Costume Jewelry Pin (This is pinned to the card and also pop-up dots hold in place. Pop-up Dimensionals are between layers of paper. The text is Vellum (don't know what company) attached to Whisper White square. http://www.theplaydatecafe.blogspot.com/

FM07 Friday Mashup

Image
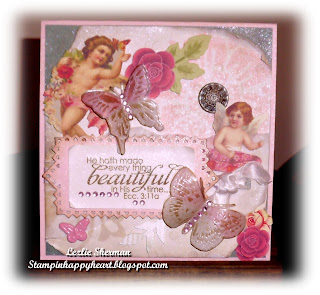
This week's challenge is for anything feminine....ribbons, pearls, etc. Supplies are: Rose Red Cardstock (SU). The paper is unknown as it was stuck in a drawer for a long time and no company on the back. It is light pink, dark pink and some medium green shades. The largest butterfly is collaged by using Kelly Panocci Valentine Emphemera and then putting it through the Big Shot using an embossing folder. Versamark Ink and Clear Embossing Powder were heated and repeated creating the glossy finish to the large butterfly. Next I attached 'Pretties' pearls and the 'pin' and beads (Stampin Up). The second smaller butterfly is clear embossing ink on vellum with white embossing powder (using heat). Next I antiqued it with pink and green chalk and sprayed a small amount of 'Shimmer' over top. The butterfly small stamp is by Ellen Vener/Village Arts Press. The 'Vintage' stamp is by Hampton Art Stamps. The ribbon is 'Rose Red' by SU. Misc. Supplies: Sti

Happy Mother's Day Card

Image
Just want to say 'Happy Mother's Day to you all....thanks for taking time to stop by here. The instructions are a little late and I apologize for that...but here they are: Cut 'vanilla' card-stock to measure 10 1/2" by 5 1/2". Fold in half to make the card base. Cut a piece of DSP (I used Baha Breeze Patterns by Stampin Up) 5 1/4" by 5 1/4". Use a punch to round the corners on both the card base and the paper piece you just cut. Adhere the paper to the front of the card. This is the first layer. Next I cut a piece of 'vanilla' 5" by 5" and also one 4" by 4". These two pieces are both punched around the corner and edges with the Martha Stewart 'Daisy Fan' punches. Next I used a square die and cut the center out of each one.....to leave a 'window' (2 1/2" by 2 1/2"). Sponge edges with ' Baja Breeze' SU ink. These layers are both attached with pop-up dots. The next layer is a Spellbind

SSS 106 The Sweet Stop Challenge

Image
Supplies: Stamps: Sweet 'N Sassy Stamp Set 'New Creature'Cardstock: Stampin Up: Ballet Blue, Basic Black.DSP: Stampin Up: Pawsitively Prints.Misc Paper: Watercolor (for butterfly and text areas).Ribbon: Stampin Up: Pretty In Pink (do not have the exact name...only color).Dies: Spellbinders: Labels Four and Rose Blossom.Punches: Martha Stewart Deep Edge Daisy Fan and the small and medium Oval punch from SU.Chalk: Stampin Up Blending Pen.Misc: Pop-up Adhesive circles, pink rhinestones and sticky strip. Directions: Attach black and blue layers to blue card base. Attach scallop punchout to back of next layer of DSP mounted on basic black. I attached this next using sticky strip. Next I created another layer of DSP and basic black. The ribbon is attached to the back only but runs around the front of this piece. This layer is attached with dimentionals. Next I cut out the label layers and ovals.The text 'friend' is stamped on before I cut out in order to center it. I att

SSS106 Sweet 'N Sassy 'New Creatures' Scripture Verse

Image
The scripture is from Sweet'N Sassy Stamp set 'New Creature'. Other Products used: Stampin Up Cardstock: Pink Pir., White Textured, Vellum and Bridal Specialty Papers. Also Tim Holtz 'Seasonal'. Ink: SU Soft Suede and Pink Pir. Embellishments: Butterflies are Michaels G brand and Anna Griffin. The Rhinestones are 'Treasures By Shabby Chic'. Brads are SU Antique Brads and Butterfly 'Hot Off The Press'. Misc. Supplies: Smooch spray, Sticky Strip, Embossing White Pearls (Joann's) and a sponge for antiquing. Die Cuts are Kelly Panocci Valentine Emphemera. Tools: Embossing Heat Tool, Sizzix Big Shot, Texture Plate, SU Heart Border and corner punches, Slot punch, SU Elegant Trio Stencils. Directions: Cut Cardstock to make card base 5 1/4 X 5 1/4" (from Pink Card Stock). Fold card in half. Cut next layer from a darker color. I used Tim Holtz antique looking solid paper from the 'Seasonal' paper stack. Cut 5 X 5". Attach using sticky st

Hand-painted Bear W/Heart

Image
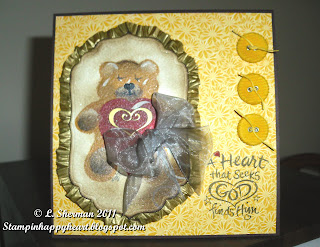
This is a little bear I painted on Watercolor paper. I added a little SU DSP and a few buttons along with a greeting.